Mastering Artificial Turf Installation Techniques
- Hayden Griffin
- Nov 28, 2025
- 4 min read

If you’re thinking about upgrading your outdoor space, artificial turf is a smart choice. It looks great, feels nice, and saves you tons of time on maintenance. But getting it right means knowing the best turf installation techniques. Don’t worry, we’ll walk you through everything you need to know. By the end, you’ll feel confident tackling your project or knowing exactly what to ask for when hiring pros.
Why Turf Installation Techniques Matter
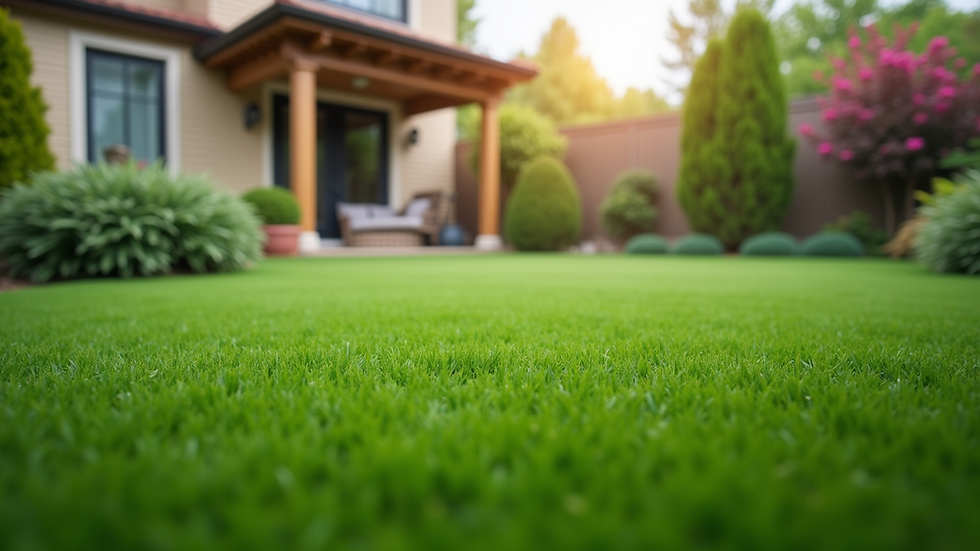
You might think laying down artificial grass is as simple as rolling it out and securing it. Nope, it’s a bit more involved than that. The right techniques make sure your turf looks natural, lasts longer, and handles weather changes without issues. Plus, good installation prevents problems like bumps, wrinkles, or drainage troubles.
Here’s why you should care about the details:
Durability: Proper base prep and installation keep your turf in top shape for years.
Appearance: Smooth, even turf looks way better than patchy or wrinkled grass.
Drainage: Good drainage means no puddles or soggy spots after rain.
Safety: A well-installed lawn is safer for kids and pets to play on.
If you want your lawn to be the envy of the neighborhood, mastering these techniques is key.

Essential Turf Installation Techniques You Should Know
Let’s break down the main steps and tips for a solid artificial turf installation. Whether you’re doing it yourself or supervising a crew, these points will help you get it right.
1. Start with a Clean Slate
Remove all existing grass, weeds, rocks, and debris. You want a clean, flat surface to work with. This might mean using a sod cutter or a shovel. Don’t skip this step! Any leftover roots or bumps will show through your turf.
2. Prepare the Base Properly
This is the foundation of your turf. A well-prepared base ensures good drainage and prevents sinking or shifting. Usually, you’ll want to:
Excavate the area about 3-4 inches deep.
Lay down a weed barrier fabric to stop new weeds.
Add a layer of crushed rock or decomposed granite.
Compact the base firmly using a plate compactor.
Taking your time here pays off big time.
3. Roll Out and Position the Turf
Unroll your turf and let it sit for a few hours to flatten out. Then, position it carefully, making sure the grass blades all face the same direction for a natural look. Trim edges as needed with a utility knife.
4. Secure the Turf
Use landscape staples or nails around the edges and seams to keep the turf in place. For seams, use special turf tape and adhesive to join pieces invisibly.
5. Add Infill
Infill helps the turf blades stand up and adds cushioning. Common options include silica sand or rubber granules. Spread it evenly and brush it in with a stiff broom.
6. Final Grooming
Brush the turf again to lift the blades and remove any loose infill. Give it a good watering to settle everything.
Following these steps carefully will give you a lawn that looks great and lasts.

What do you put underneath artificial grass?
This is a question we get a lot. The answer is simple but important. What you put underneath your artificial grass affects drainage, stability, and longevity.
Here’s what you typically need:
Weed Barrier Fabric: This stops weeds from growing up through your turf. It’s a thin, permeable layer that lets water pass but blocks roots.
Base Material: Usually crushed rock or decomposed granite. This layer provides drainage and a firm surface. It also helps prevent the turf from shifting or sinking.
Compacted Soil: Before adding the base, make sure the soil is level and compacted. This prevents uneven spots.
Avoid putting turf directly on dirt or grass. That leads to poor drainage and a bumpy lawn.
If you want to get technical, the base should be about 3-4 inches thick and compacted in layers. This setup keeps your lawn looking fresh and feeling firm underfoot.

Tips for a Smooth DIY Turf Installation
If you’re rolling up your sleeves and doing this yourself, here are some handy tips to make the process easier:
Measure Twice, Cut Once: Always double-check your measurements before cutting turf. Mistakes waste material and money.
Work on a Dry Day: Wet conditions make base prep and turf laying tricky.
Use the Right Tools: A utility knife, plate compactor, landscape staples, and a stiff broom are must-haves.
Get Help for Big Areas: Turf rolls can be heavy and awkward. A second pair of hands makes positioning easier.
Take Your Time: Rushing leads to mistakes. Spread the work over a couple of days if needed.
Remember, if it feels overwhelming, you can always call in the pros. They have the experience and equipment to get it done right the first time.
Why Choose Coop Turf for Your Project?
If you want to skip the hassle and get a flawless lawn, Coop Turf is the go-to expert in the Dallas-Fort Worth Metroplex. They specialize in artificial turf installation and make sure every customer is super happy with their new, easy-to-care-for lawn.
Here’s what sets them apart:
Local Expertise: They know North Texas soil and weather conditions inside out.
Quality Materials: Only the best turf and base materials go into their projects.
Professional Crew: Experienced installers who pay attention to every detail.
Customer Satisfaction: They don’t just install turf - they build lasting relationships.
Choosing Coop Turf means you get a lawn that looks great, feels great, and lasts for years.
Getting Your Lawn Ready for the Future
Once your turf is installed, maintenance is a breeze compared to natural grass. But a little care goes a long way:
Regular Brushing: Keeps blades upright and looking fresh.
Rinse Occasionally: Wash off dust and pet messes with water.
Check Infill Levels: Add more if the turf feels flat.
Inspect Seams and Edges: Fix any loose spots early.
With these simple steps, your lawn will stay beautiful and functional for a long time.
Mastering artificial turf installation techniques isn’t rocket science. It’s about following the right steps, using good materials, and paying attention to detail. Whether you do it yourself or hire experts like Coop Turf, you’ll end up with a lawn that’s easy to love and easy to maintain. So go ahead - get started on your turf project today!


Comments